Introduction
We built
Parima
to give developers the option of hosting their website on Amazon Web Services' scaleable CloudFront Content Distribution Network as simply as possible. Files are hosted on Amazon S3, while Amazon CloudFront distributes the website; the end result is a completely customizable website with access to any AWS products required, such as API Gateway, MySQL Aurora, or EC2.
Parima doesn't need to only be used for brand new sites. Existing websites can be moved from other hosts, such as Digital Ocean, GoDaddy, or Netlify.
What You Need for this Tutorial
-
Around thirty minutes
-
A favorite text editor or IDE
-
Knowledge of which Domain Name Registrar you are using for your Site or Application Domain, as well as knowing how to log in to make changes
-
Access to an
AWS account,
preferably with Root Access
Step 1: Download or prepare a local copy of your website, or build a new replacement website.
Use whatever method you prefer to prepare a copy of your website on your local machine.
Existing static sites can be downloaded via FTP, while a site built with a JavaScript framework or a Static Site generator will need to be re-built from the source files. Of course, you can create a brand new version of your website to use for your new AWS hosted version. If you plan on simply moving your site with no design or content changes, you may want to consider adding a small change to the site (even just an HTML comment in the index.html file) in order to easily verify when the site has been fully transferred to AWS (step 8).
Here are some Tutorials on creating your website:
NOTE:
The upcoming version of Parima (1.2) will also allow git integration and builds within AWS, in addition to AWS S3 Sync. Static HTML sites will by default be organized into a ./public subfolder under your main project folder; this would be the easiest way to organize your git-integrated static site for all upcoming verions of Parima. (Hugo, Gatsby, Angular, and React JS applications will follow their standard folder structure.)
Step 2: Create an AWS Account (if you don't have one already)
Parima requires you to have your own Amazon Web Services Virtual Private Cloud.
AWS provides a generous
Free Tier
that includes all products used by Parima outside of Route 53 charges for your Hosted Zone (USD $0.50/month) and your Domain Registration fee.
NOTE:
It is always a good idea to have an
AWS Budget
with an alert set up before using AWS, to prevent any unexpected costs. For Parima, USD $5 per month should be more than enough.
Step 3: Create your AWS Cloudfront Distribution using Parima
Follow the instructions from the
Parima README on GitHub
to use Parima to launch your static site, as there are two different methods to choose from, through the AWS Console and through AWS CLI.
As this is meant as a replacement of your current site, we recommend leaving the HostedZone and DomainName parameters blank for now; once you have previewed the AWS version of your site and have found that it works as you expect, you will be able to re-run Parima to transfer your domain to AWS.
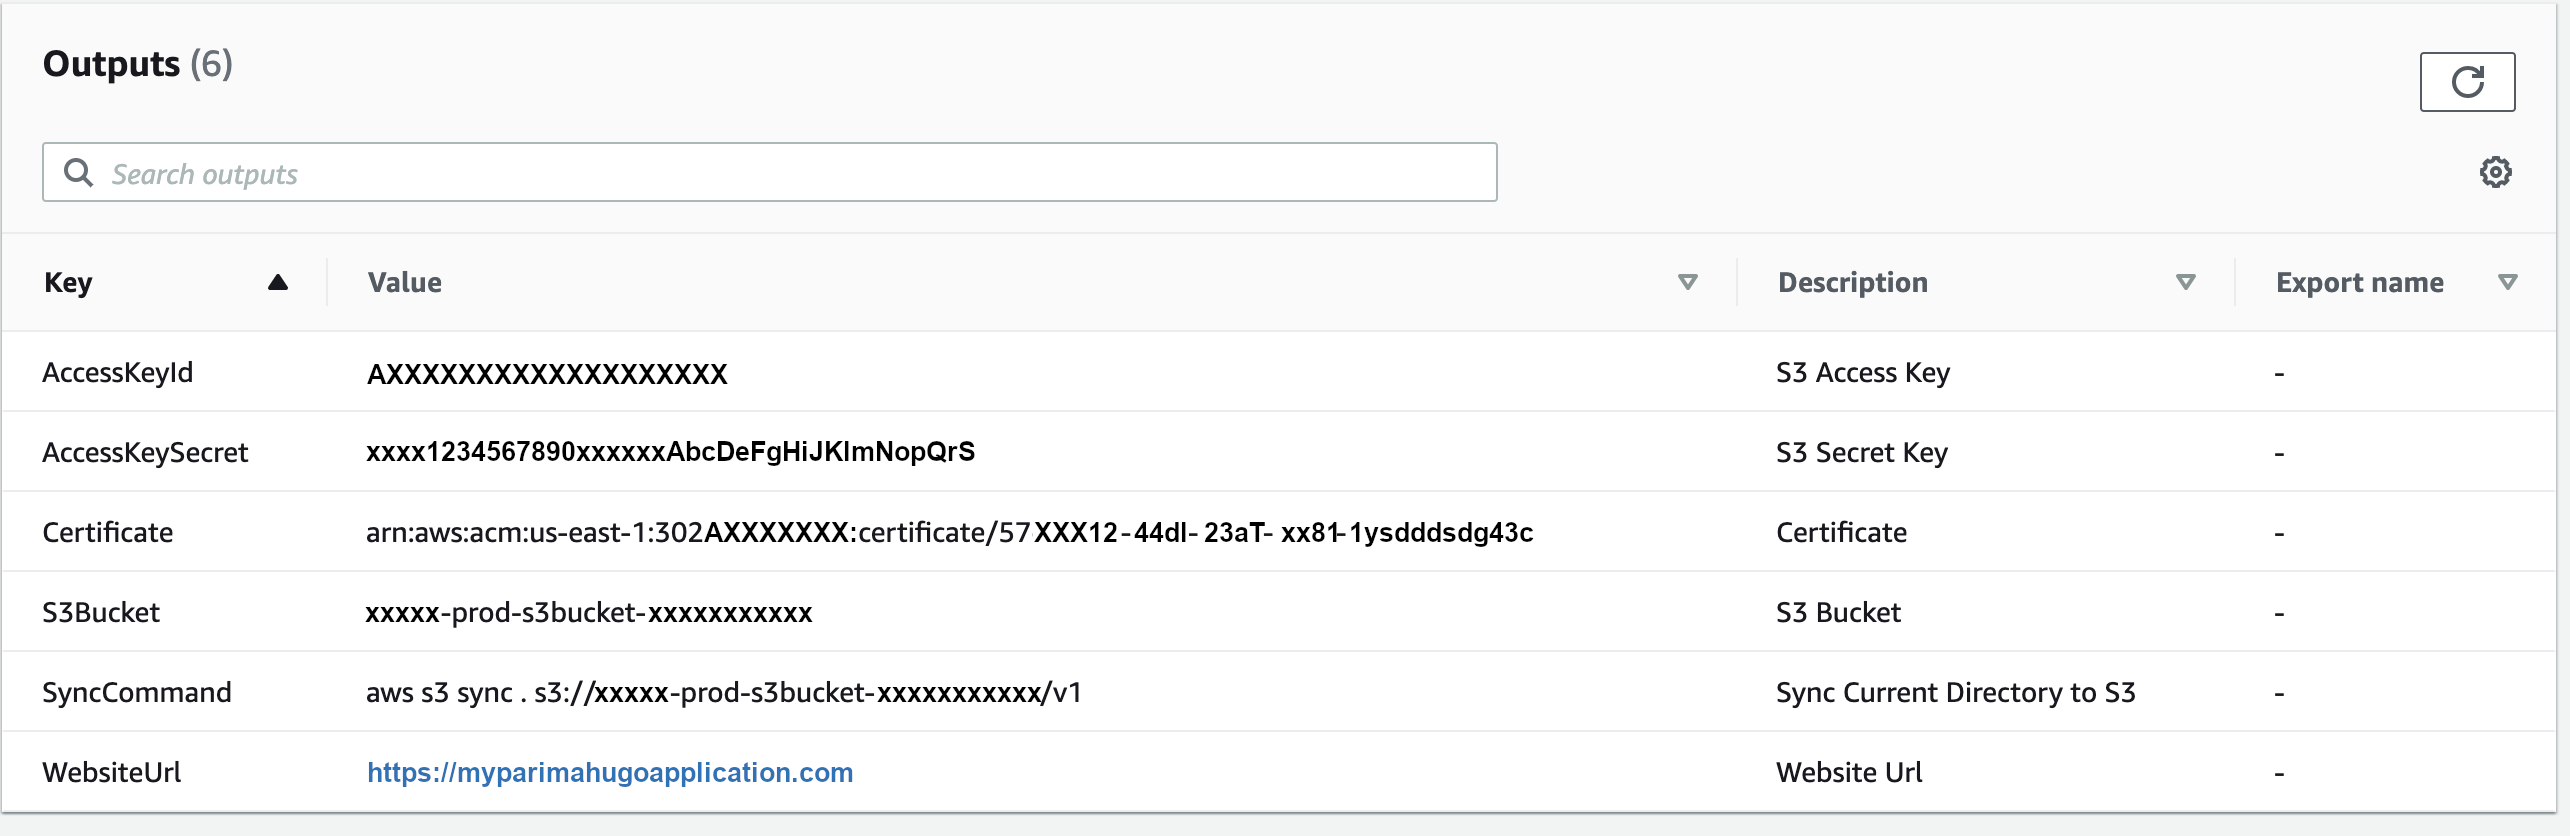
Once the CloudFormation template has been completed, you can click on the "Outputs" tab under your Completed Stack in CloudFormation to view the information you will need to set up the AWS S3 Sync that will deploy your static site code.
Step 4: Deploy your site using AWS S3 Sync
Follow the instructions from the
Parima README on GitHub
to run the AWS S3 Sync command that is listed in your "Outputs" tab in CloudFormation.
Be sure to run Sync from the ./public or ./dist folder of your site, where the public, generated, and/or bundled code is located. You do not want to include any unneeded files, and you want to make sure your deployment files are located in the root folder of your site, which by default is /v1/.
Step 5: Test Your Site on AWS CloudFront
Open the
WebsiteUrl provided in the "Outputs" tab in CloudFormation to view your newly deployed static website. It will have a *****.cloudfront.net URL, since you have not yet transferred your existing domain.
Note:
if you do not see the home page of your site when you visit the CloudFront URL, check to see if you ran Sync from the right folder on your local computer. You can always run Sync an additional time to try again.
If you still run into an issue, you can let us know on the
r/parima subreddit.
Step 6: Prepare Your Domain and its DNS for AWS
If your website or application is hosted by a service such as Digital Ocean, GoDaddy, or Netlify, you likely have your domain registered outside of Amazon Route 53, which is the DNS provider used by AWS.
You can
transfer your domain to Amazon Route 53,
or you can
create a Hosted Zone on Route 53, and update your DNS Nameservers on your domain name registrar.
Of course, there are some situations where your existing website does not yet have its own Custom Domain.
In that case, the easiest route to setting up that domain is to
register your new domain using Route 53.
It's quite common to use your existing domain registrar, rather than transferring, to here are some instructions on how to make it happen:
-
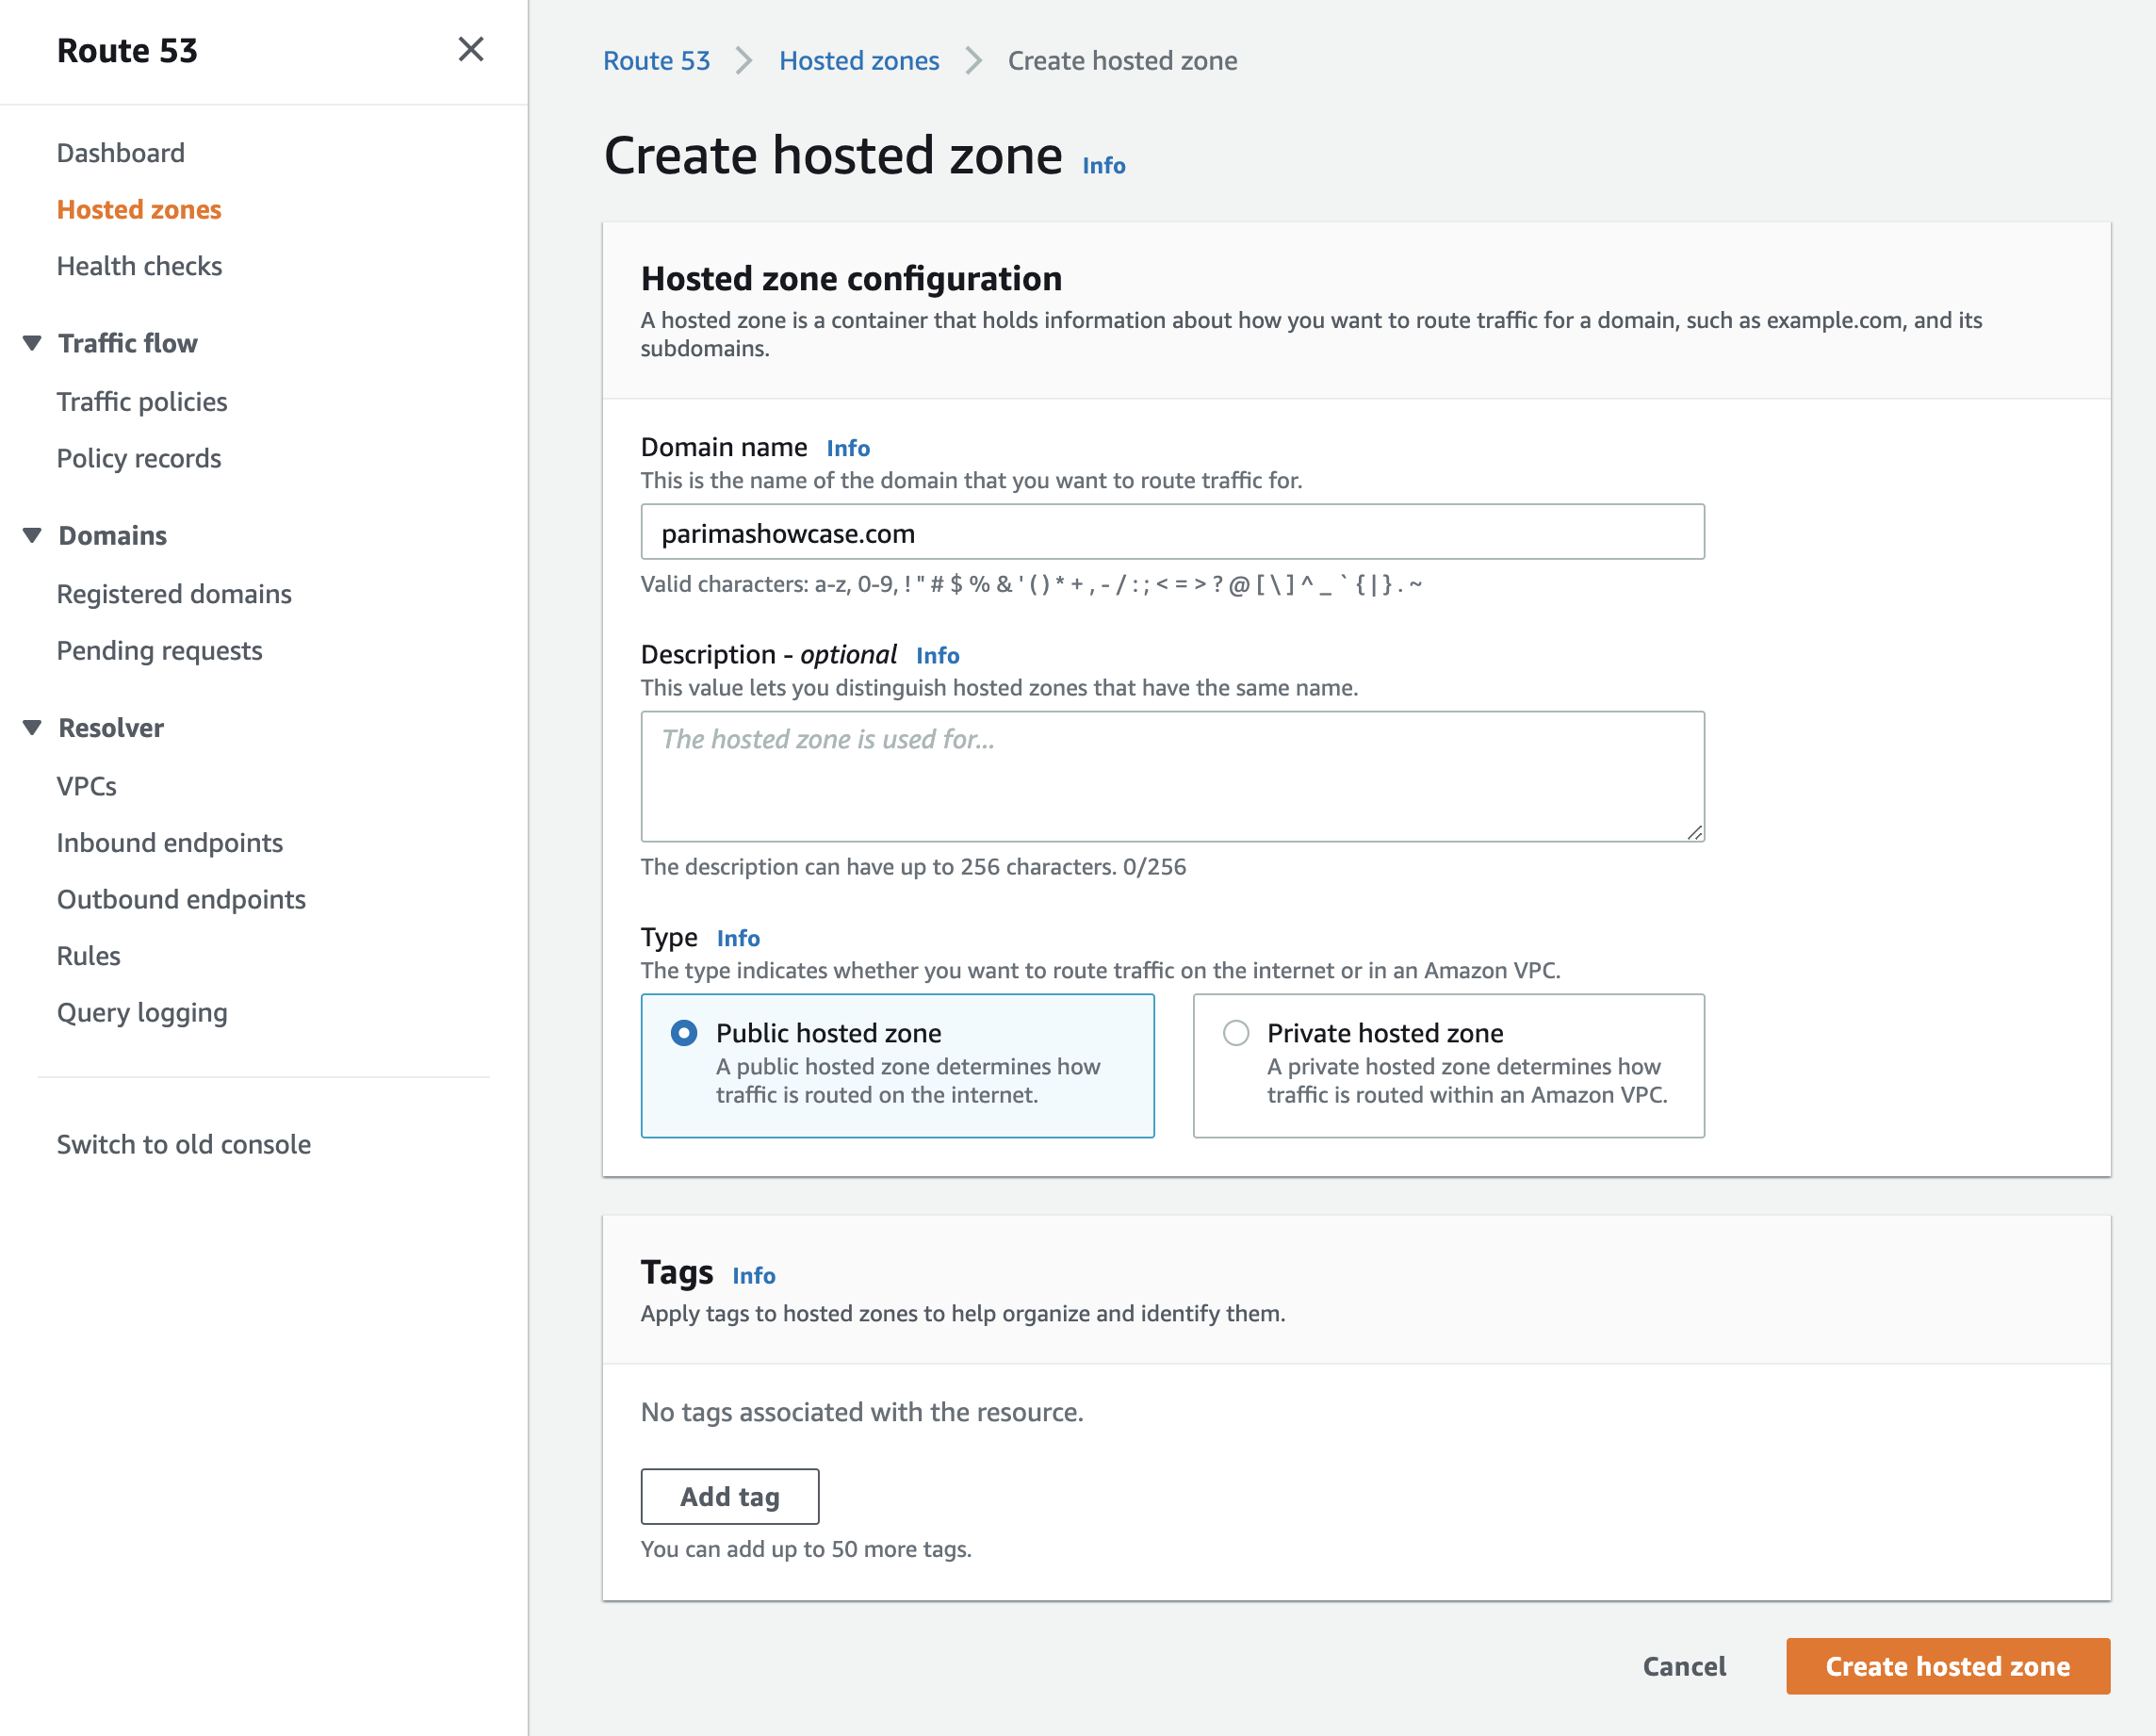
Hosted Zone Setup
Go to create a new hosted zone to begin. Supply your domain name and leave "Public hosted zone" selected.
Once you click "Create hosted zone", you will be provided with your nameserver info, which you will need to provide to your domain registrar to have them point your domain to your new Route 53 Hosted Zone.
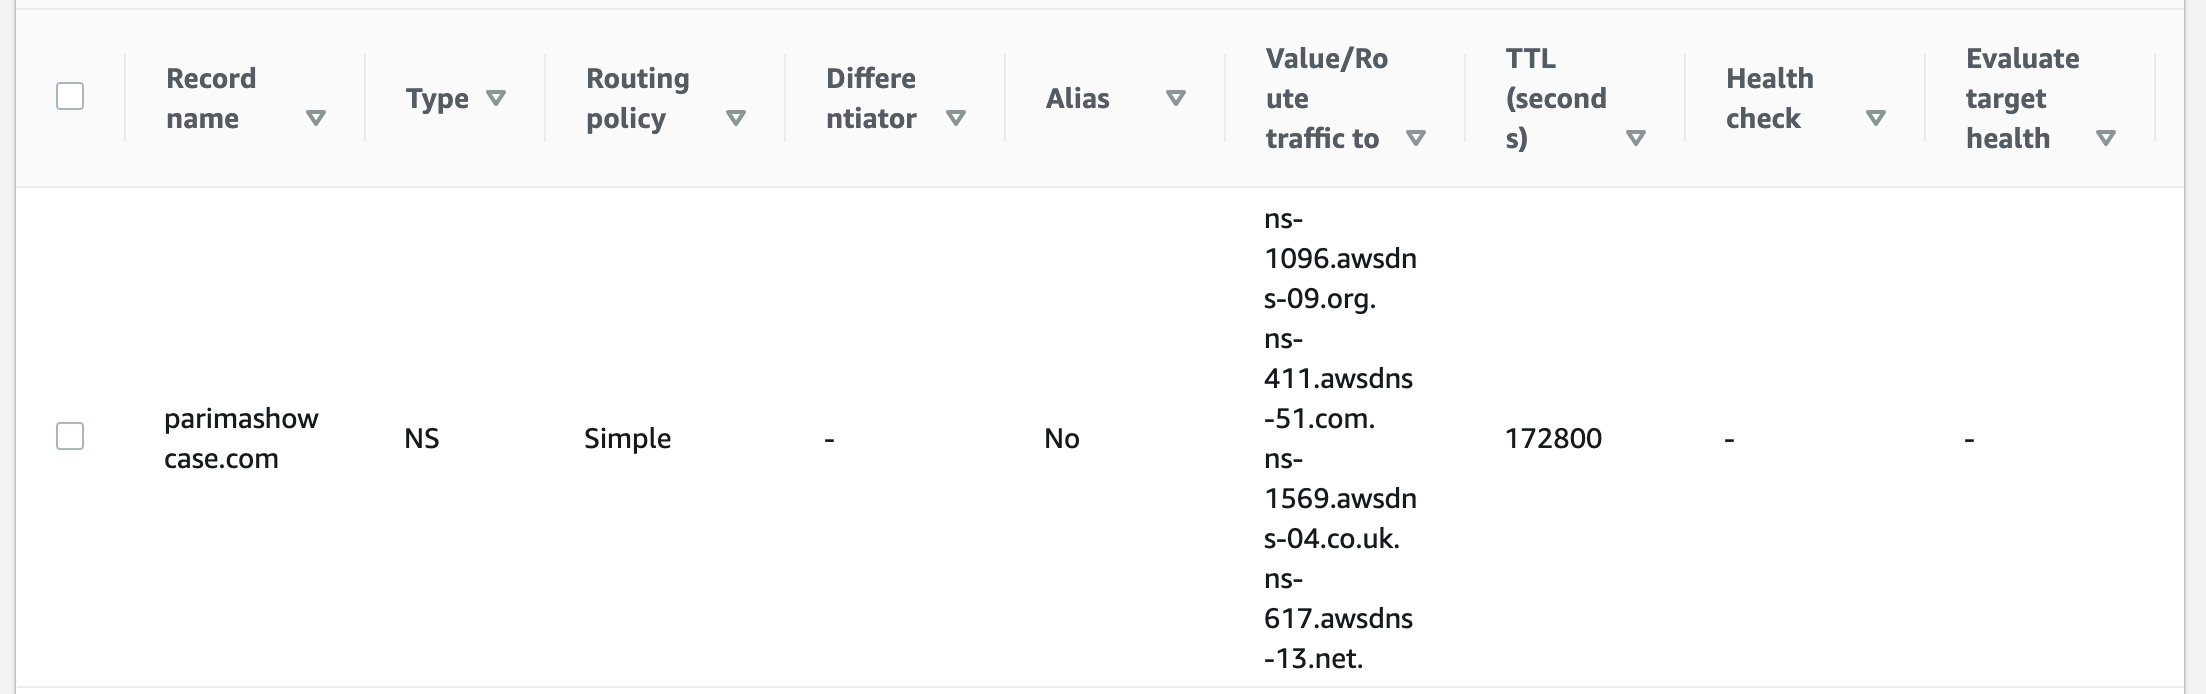
Two records are created for the new Hosted Zone:
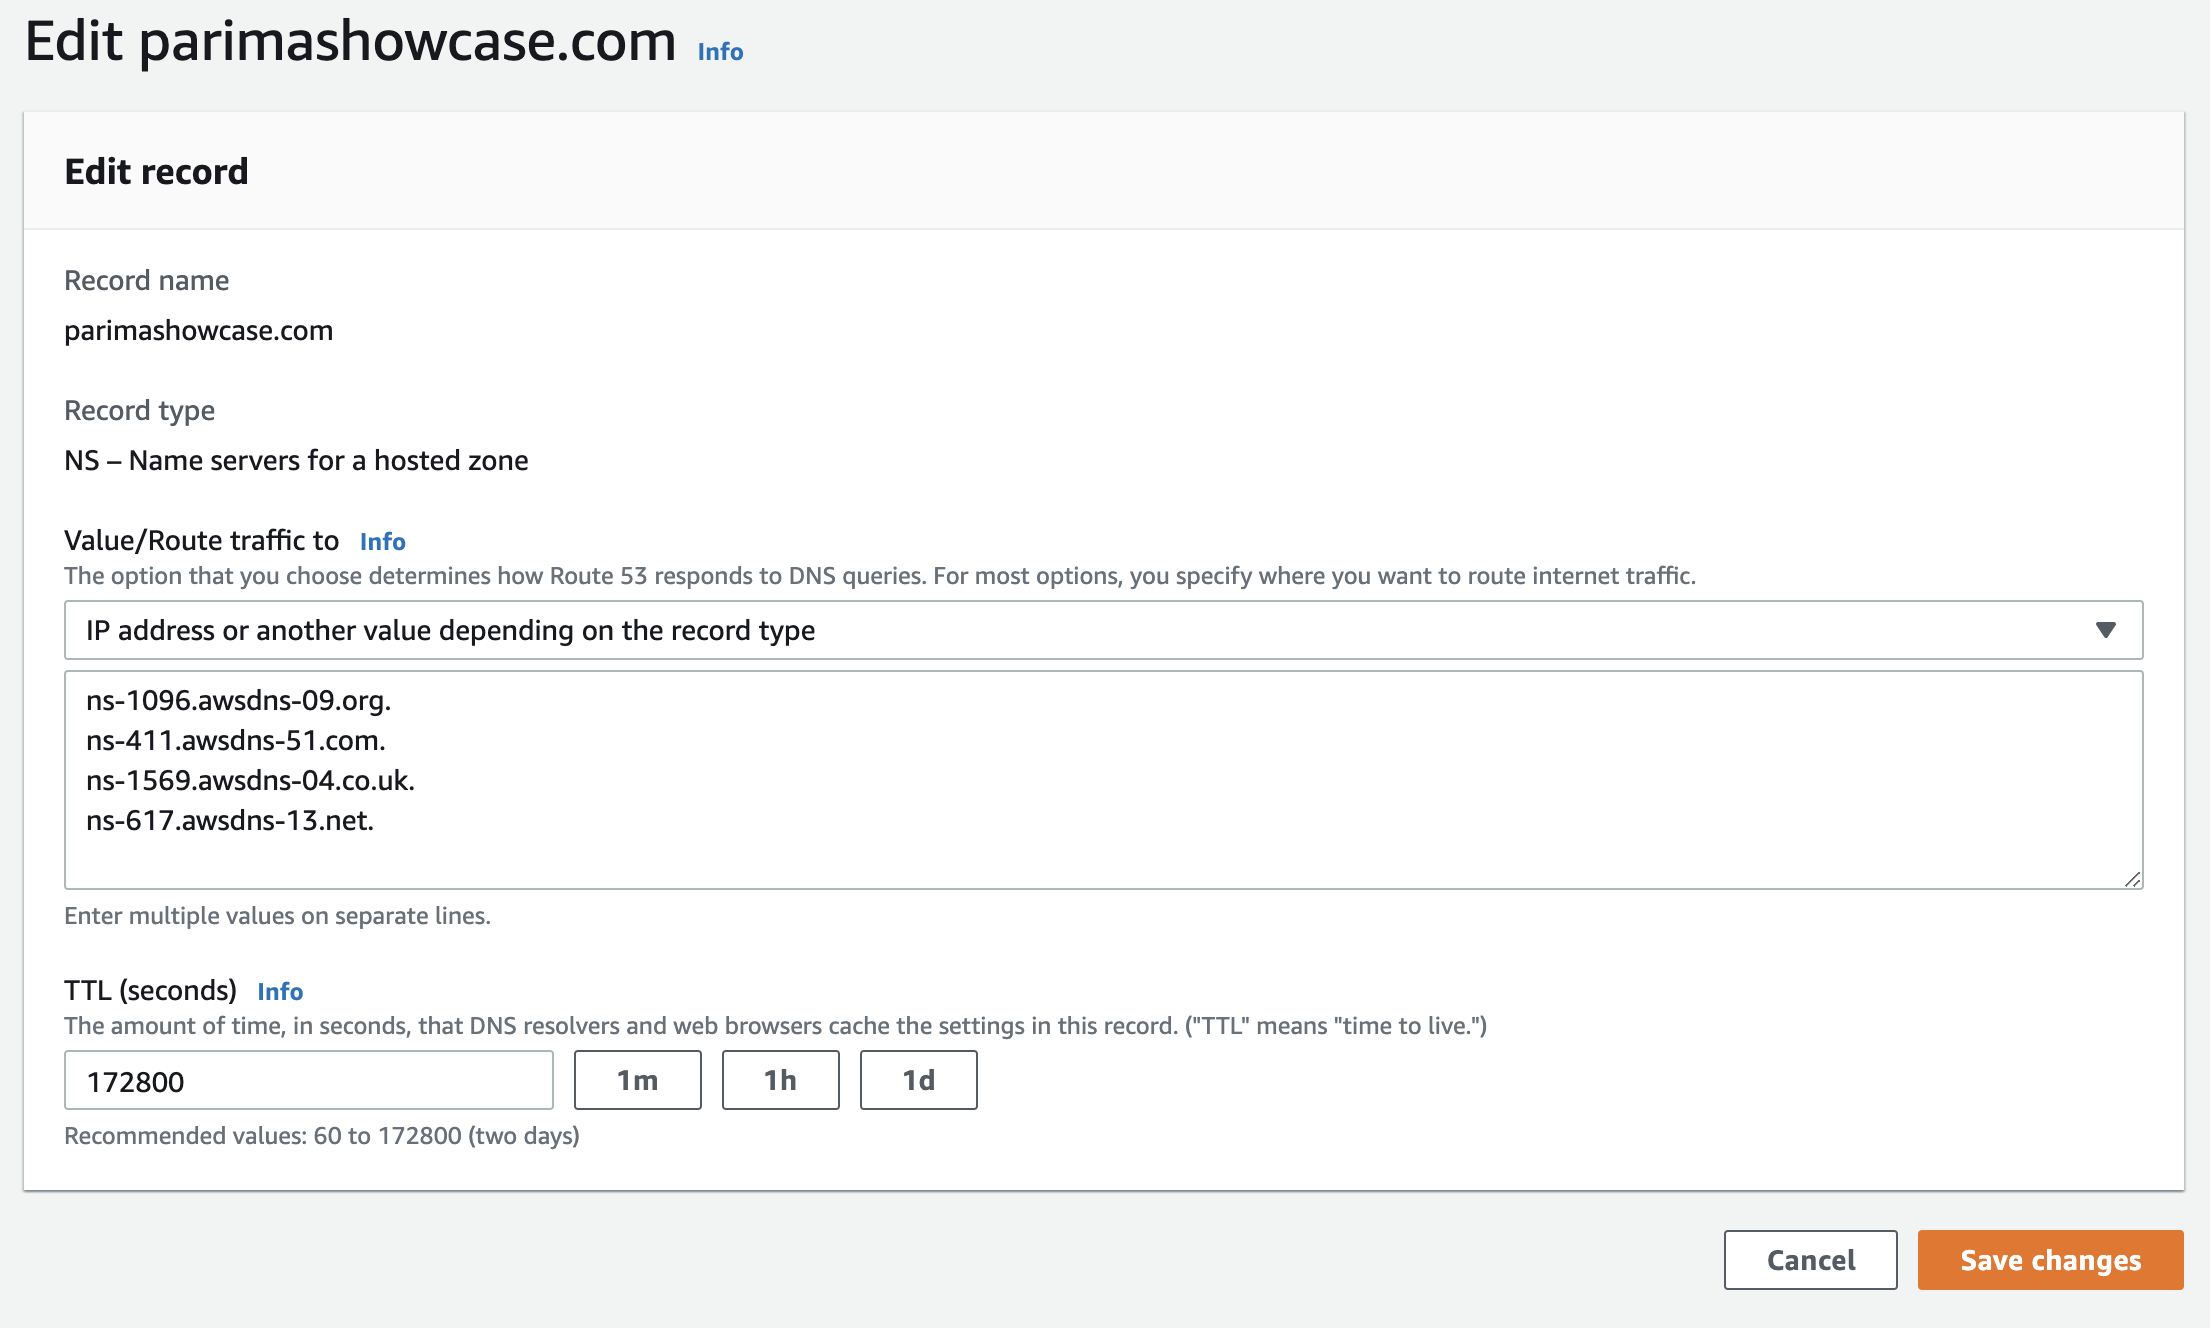
The nameservers may be confusing to read on some screens; you can chose to edit the "NS" entry to get a better view.
The four "ns-" values are your nameservers. You will want to keep this browser tab open, or copy these into a file for safekeeping.
-
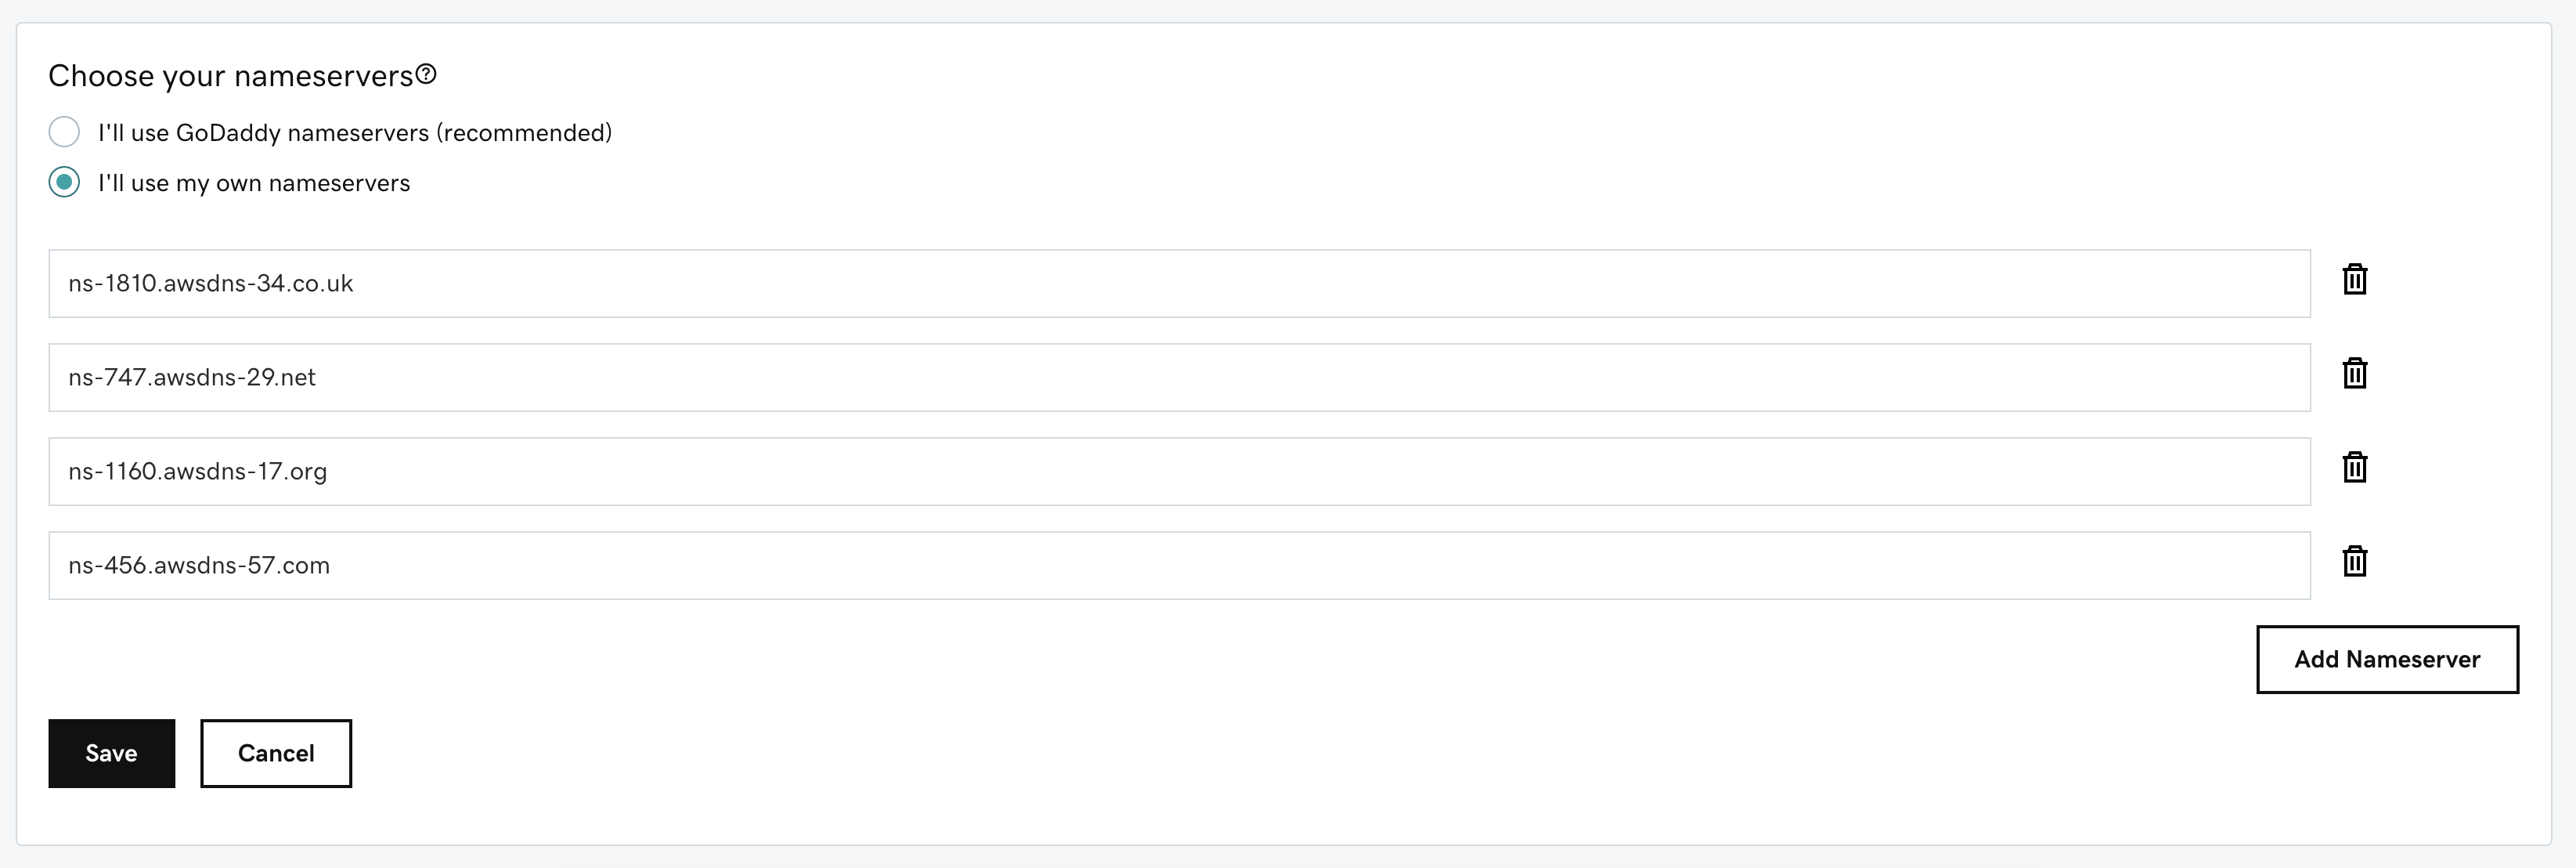
Update Your Domain Nameservers on your Domain Registrar's Website
Go to where you first registered your domain name, and log in. Find your domain on your list of domains, and there should be a link or button that reads "Manage DNS" or "Edit Nameservers".
If your site is hosted on your registrar (like you have a GoDaddy.com domain and website), you may need to choose "Custom Nameservers" to add your Route 53 entries.
Be sure to paste all four of your nameservers into the available fields, and save your changes.
It should take around an hour for the the changes to start being used, and it could take up to 48 hours for your DNS change to spread all around the world. That means that for a period of just under two days, visitors to your domain may see the old website or the new one. Most visitors should see the new site within the first 24 hours, however.
Note:
Whether you have registered a new domain, transferred an existing one, or updated your nameservers, you will want to move on to the next step, adding your custom domain to your Parima-launched site, as soon as possible. If you wait for an hour or so, some visitors may be sent to AWS and won't see your new site unless you've run the update.
Step 7: Update Your Parima-Launched Site to Use Your Custom Domain
If you don't still have CloudFormation open from when you first created your CloudFront Site, go to your
CloudFormation Stacks
and select your Parima-launched site's stack. Choose "Edit", make sure "Use current template" is selected, and then click "Next".
You will then see the same parameters that were shown when first creating the stack.
Add your domain name to the DomainName field, and use the same value for your HostedZone.
NOTE:
the difference between these two fields is that you can specify a subdomain for DomainName, instead of using "www.MyDomain.com" or "MyDomain.com".
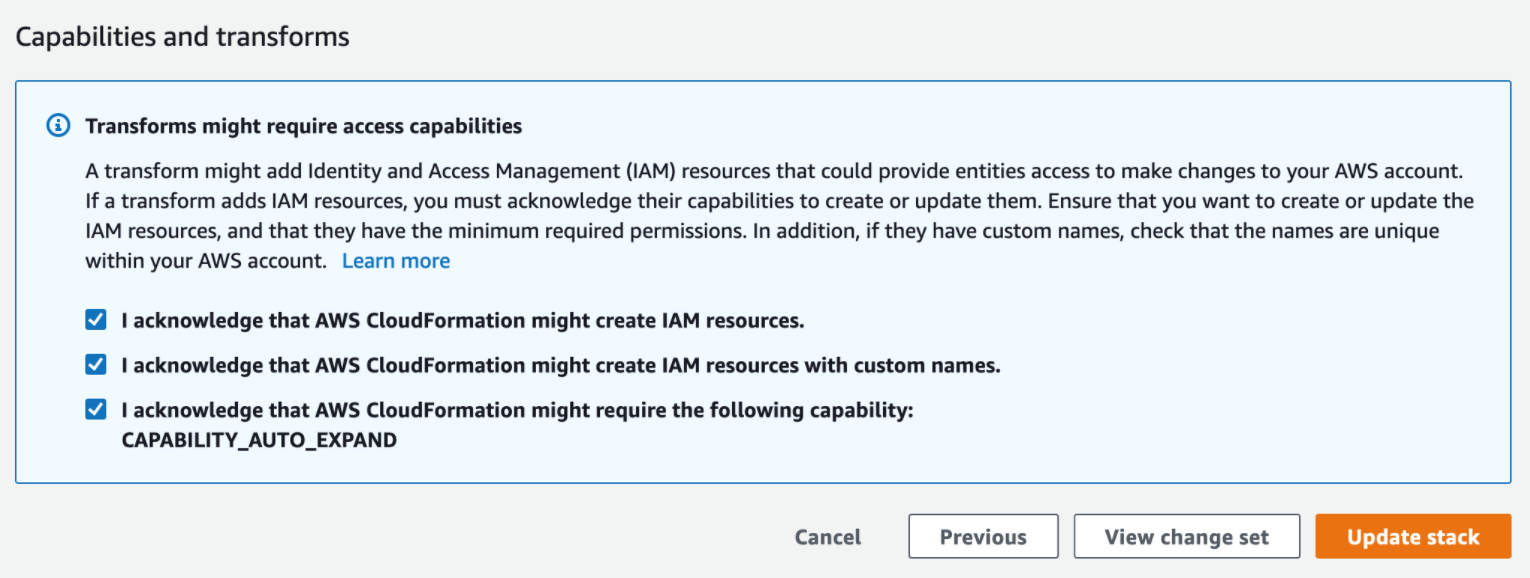
Click through the "Next" buttons until you reach the acknowledgement checkboxes. Check those, and click the "Update Stack" button. It should only take a few minutes (less than fifteen) for your custom domain to be added.
Step 8: Confirm that Your New Site and Custom Domain are Working As Expected
It may take around one to three hours (or up to two days), but you should be able to confirm that your new website is working as expected using S3 and CloudFront.
This is when you'll want to check anything that you've changed between the two versions, to confirm that you are looking at the AWS version. You could also check the nameservers using your terminal, e.g., host -t ns mydomainname.com.
Even if you are able to see the new site is on AWS, it's best to wait the full 48 hours (or even 72 hours) before deleting/cancelling your previous web hosting.
If you run into an issue that you can't figure out, you can let us know on the
r/parima subreddit.
Summary
That's the whole process for transferring an existing site or application to AWS using Parima.
If you would like to know how to create a new site or application AWS using Parima, check out these tutorials:
 FormKiQ vs. Off-the-Shelf Software and Less Flexible SaaS When is FormKiQ a better choice than Off-the-Shelf Software and Less Flexible SaaS?
 FormKiQ vs. Building It Yourself How does FormKiQ save time over custom in-house solutions?
 Use Cases FormKiQ works for small and large workflows, across all verticals and industries.
 FormKiQ For Teams Find out how FormKiQ can work for your team
 FormKiQ For Industries Discover the advantages FormKiQ can bring to your industry
 Blockchain and Decentralized Storage Leverage web3 technologies including proof of work and distributed systems for document control and data privacy
 Content and Digital Asset Management Integrate with your preferred web content management system while leveraging FormKiQ for managing your digital assets
 Document Management Module Integrate all of the required functionality of a document management system into an existing software solution
 Integration with QMS or LIMS Add missing functionality for your Quality Management or Laboratory Information Management by integrating with FormKiQ
 Job Application Form Receive applications, including cover letter and resume attachments, and import into an existing HR Management System
 Legal Discovery Tool Find information quickly by combining full-text search with AI-powered document classification
 The Paperless Office: Digital Document Processing Collect, process, and store paper and digital documents, allowing for archival, integration, and future recall
 Product Leasing System Process client lease applications, including a credit check and approval workflow
 Company-Wide Break down the silos in your organization with a centralized control center for documents, ready for integration with any and all systems
 Engineering and Product Reduce development time and agony with battle-tested components for your applications
 Finance and Accounting Process paper and electronic invoices and receipts, ready for integration with your important systems
 HR and Recruiting Build and support your people across the organization by integrating with your essential tools
 IT and InfoSec Provision a secure document store with the encryption and controls needed for compliance and protection
 Legal Manage and safeguard contracts and other essential documents across systems
 Marketing Add better discovery and reliability to digital assets and other essential content, while enabling integration with a web content management system
 Sales Keep track of sales assets and contracts inside and outside of your CRM and other tools
 Accounting, Financial Services, and FinTech Standardize financial documents, metadata, and workflows across systems, teams, auditors, and clients
 Education, Training, and EdTech Integrate Learning Management Systems with other essential applications and tools
 Healthcare, Life Sciences, and MedTech Combine secure and compliant records management with laboratory information management systems
 Law Practices and Legal Services Ensure efficient legal discovery and case management
 Logistics and Transportation Provide a robust and customized solution for fleet management or other logistics needs
 Manufacturing, Production, and Utilities Control and distribute essential documents and standard operating procedures within and between facilities, partners, and clients
 Online Entertainment, Gaming, and Gambling Provide the required compliance documents to partners, customers, and government agencies
 Professional and Technical Services Ensure that clients, inspectors, and subcontractors are aligned with consistent document control
 Tech Startups Build robust document management functionality into your disruptive product